The holiday season is a time for spreading joy, love, and appreciation. And, one way to do that is by giving gifts. Make your Christmas gifts truly special by paying careful attention to the way you present them. As the saying goes, “It’s the thought that counts,” and that thought extends not just to the gift itself, but to the care and creativity one puts into its presentation.
Choosing the right packaging for your product can enhance the overall experience for the receiver. By considering the recipient’s taste, the occasion, and a few creative touches, you can elevate your gift-giving to a whole new level, helping to create cherished memories that will last a lifetime.
Here are some packaging tips that will add a delightful twist to your gift-giving experience:
-
Wrap-tastic Personalized Packaging
Create or order personalized wrapping paper featuring the recipient’s name, favorite colors, or memorable photos. Think about what makes your loved one smile. Think of their favorite color, hobby, or passion. Maybe certain patterns or images are dear to them. Consider these preferences when you design your paper.
Write their name in a way that’s uniquely them. Go ahead, use fancy calligraphy or any style you’re comfortable with. Splash their preferred colors on the paper to make it pop. You can also add personal images, like photos, drawings, or artwork.
-
Upcycled Gift Wrap for the Vintage Lover
If you’re eager to move away from disposable wrapping paper, why not explore the world of upcycling for your gift wrapping needs? It’s not only cost-effective but also eco-friendly. Additionally, upcycling offers an exciting outlet for your creative expression.
Repurposing old suitcases as gift packaging adds a unique retro touch to your presents. Not only does it make the gift more memorable, but it also gives the recipient an extra keepsake to cherish. Line the interior of the suitcase with colorful tissue paper or fabric, creating a visually appealing backdrop for your gift.
You can use the different compartments and pockets within the suitcase to hide smaller gifts or messages, adding an element of surprise. Lastly, secure the suitcase with a decorative ribbon or vintage-style luggage tags.
-
Quirky Containers for the Creatives
Think outside the box by using unconventional containers, like vintage tins, flowerpots, jars, or decorative tea tins for your gift.
Here is an idea you can try at home: Fill mason jars with homemade cookies, hot cocoa mix, or layered cake ingredients. Attach a tag with preparation instructions for a delightful edible gift.
-
Japanese Tales of Gift Giving
Infuse an element of Zen to your exchange gift events. Discover the art of Furoshiki and Origami – two traditional Japanese practices that not only add an aesthetic touch to your presents, but also convey a sense of serenity and mindfulness.
-
Fun While Packaging with Origami
Origami boxes can be crafted from a single sheet of paper. These hand-folded wonders not only hold your precious gifts but also carry a touch of artistry. You can choose paper in various colors, patterns, or even a handmade option to suit the occasion and recipient’s preferences.
For a basic origami box follow these steps:
- Start with a square piece of paper, color-side down.
- Fold it in half diagonally to form a triangle, then unfold.
- Fold it diagonally in the opposite direction to make another triangle, and unfold.
- Fold it horizontally and vertically, crease well, and unfold.
- With the colored side up, bring opposite corners together to create a smaller square.
- Fold along the diagonal creases to make a smaller triangle.
- Unfold to reveal a square with four smaller squares inside.
- Collapse the squares along the diagonal creases to form a kite shape.
- Fold the top and bottom flaps to create the box.
-
Furoshiki: Where Eco-Friendly Meets Elegance
Furoshiki, the Japanese art of gift wrapping using fabric, epitomizes eco-conscious presentation. This practice of wrapping gifts in beautiful cloth is not only a sustainable alternative to disposable wrapping paper, but also a visual delight. It’s a marriage of sustainability and elegance, where every fold and knot tells a story and transforms gift-giving into an art form.
-
-
The Charm of Classic Wood Pieces
Wooden boxes are timeless and elegant choices when it comes to packaging your gifts. These boxes are readily available in the market, offering a touch of sophistication and natural beauty.
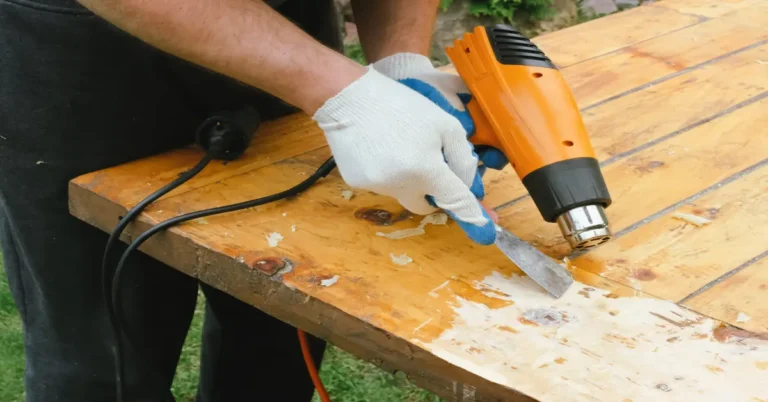
To elevate their appearance and add a touch of class, consider painting or adding a layer of varnish. Whether you opt for a rustic, vintage look or a modern, polished finish, varnish not only enhances the wood’s natural grain but also provides a protective finish, ensuring your gift remains in pristine condition.
Try Five Star Clear Gloss Lacquer, a high-quality varnish with excellent attributes including a clear, glossy finish, strong adhesion, and long-lasting gloss retention. It is available in clear amber liquid form and comes in packaging options of 3.75L and 18L rectangular cans or a 200L drum.
-
Complete Materials for the Holiday DIYer
Before you start on your creative gift packaging journey, it’s a good idea to gather the necessary materials. Here’s a list of items to consider purchasing:
-
Paper:
Choose a variety of textures and prints to suit different occasions. Go from festive holiday themes to elegant and simple designs. -
Ribbons and Bows:
Get an assortment of ribbons and bows in different colors and styles to add a decorative touch to your packages. -
Scissors:
Quality scissors are essential for precise cutting of paper and ribbons. -
Decorative Scissors:
Decorative scissors with unique edge patterns can add a fun touch to your gift tags and decorations. -
Tape:
Ensure you have clear, double-sided, and decorative tape on hand for securing your wrapping. -
Gift Tags:
Purchase gift tags or make your own to add a personal touch and label each present. -
Stickers and Labels:
Use stickers or labels for sealing envelopes or decorating the gift packaging. -
Fabric or Furoshiki:
If you plan to use fabric or Furoshiki wrapping, select a few beautiful pieces of fabric in different sizes. -
Decorative Elements:
Gather decorative elements like dried flowers, leaves, and ornaments to embellish your gifts. -
Gift-Wrapping Organizer:
A designated container or organizer to keep your wrapping supplies tidy and easily accessible.
-
-
Glue Holds Everything Together
A binding agent to hold all materials in place, glue plays the key role of keeping your gift wrap intact. When using glue for your projects, it’s essential to opt for a robust and sturdy adhesive.
Try Apollo White Glue. It is a high-quality latex emulsion adhesive offering strong bonding and wet tack properties. It comes in milky white color, packaging options of 1L, 4L containers, or 185 kg drums. This versatile adhesive can be applied to various paper, board stocks, fabrics, book binding, and wood joints, drying in 20-25 minutes to the touch and within 1-2 hours to a hard finish.
By gathering these materials in advance, you’ll be well-prepared to create beautifully wrapped gifts with a personal and unique touch.
These creative packaging ideas are sure to make your gift-giving moments even more exciting and memorable. Tailor them to the recipient’s preferences and the occasion, and watch as your thoughtfulness shines through.
References:
https://homebnc.com/best-unique-wooden-gift-box-ideas-to-buy/
https://chatelaine.com/living/furoshiki-gift-wrapping-how-to/
https://origami.guide/instructions/easy-origami/
https://www.oprahdaily.com/life/g34015639/gift-wrapping-ideas/