Have you ever been captivated by the intricate details of furniture showcased in shops, wondering about the key to their flawless finish? Well, we’ve got the answer for you – it’s the remarkable woodworking material known as the sanding sealer. In this article, we’ll give you the basics on how to apply a sanding sealer.
With the right guidance and a sprinkle of creativity, we’ll help you enhance your woodworking projects with finesse. Create stunning pieces that radiate elegance and craftsmanship. Get ready to elevate your woodworking skills. Read on.
What is a Sanding Sealer?
Meet the sanding sealer, the woodworking magician! This awesome clear coating is like a secret weapon for all woodcraft enthusiasts out there! Carpenters and crafters often use it before applying other finishes, such as varnish, lacquer, or paint. It acts as a protective barrier that seals the wood pores, preventing the final finish from being absorbed too deeply into the wood and ensuring a more even and smooth appearance.
Users can apply sanding sealers after the initial sanding of the wood surface. They help to fill in pores, small cracks, or imperfections, creating a uniform surface that enhances the final finish’s overall look. Additionally, sanding sealers can improve the adhesion of subsequent finishes, making them an essential step in achieving a professional and long-lasting result in woodworking projects.
These sealers come in various forms, including liquid, gel, or spray. They are available in both oil-based and water-based formulations, catering to different preferences and project requirements. When using a sanding sealer, it’s essential to follow the manufacturer’s instructions and allow adequate drying time before applying the final finish to ensure the best possible outcome for your woodworking endeavors.
What is the StandardSanding Sealer Mixing Ratio
The usual ratio for sanding sealer is often “one-to-one” which means equal parts of sanding sealer and a compatible thinner or solvent. This equal mixing ratio helps thin the sanding sealer to the desired consistency for easy application.
Again, it’s essential to strictly follow manufacturer’s specific instructions. Some products might come pre-mixed and ready to use, while others may require thinning or have different recommended ratios depending on the application method or specific project requirements.
If you have any doubts about the mixing ratio or the proper use of sanding sealer, consult the product label or contact the manufacturer for guidance to ensure that you achieve the best results for your woodworking projects.
What are the Benefits of Using a Sanding Sealer?
So, what makes a sanding sealer stand out from the other materials? It’s pretty similar to polyurethane and shellac, but it has a special ingredient called zinc stearate. And trust us, that little addition makes a big difference!
With zinc stearate, sanding sealer can create a super smooth and thick layer on wood surfaces. This means you’ll have more material to work with while sanding, making it a breeze to shape and perfect wood surfaces. But, it does not end there. Sanding sealer also doubles up as a crafty lubricant during sanding, so no more sticky situations with gummed-up sandpaper like with other coatings.
Worried about cleanup? Don’t be! Some types of sanding sealer are water-based, which means easy peasy cleanup. All you need is just some mild soap and water. No fuss, no mess!
Applying sanding sealer is a straightforward process that can help achieve a smooth and professional finish for your woodworking projects.
What Do I Need to Start my Sealing Project?
Materials Needed:
- Sanding sealer
- Clean cloth or brush for application
- Sandpaper (for sanding the surface beforehand)
- Well-ventilated workspace
- Latex gloves and protective clothing (optional but recommended for safety)
Safety First
- To ensure a safe and pleasant experience while using a sanding sealer, let’s keep a few friendly tips in mind:
- Choose the right space: Always work with sanding sealer in a well-ventilated area. It’s like inviting fresh air to the party!
- Dress up for safety: Safety can be fashionable too! Before handling methylethoxy propanol, wear your stylish latex gloves and protective clothing.
- Breathe easy: Grab your trusty protective gear to protect yourself from dust particles.
Remember, safety is a top priority, but there’s no reason you can’t have a little fun while taking care of yourselves!
When is the Best Time to Use a Sanding Sealer?
So, when’s the best time to use this solution? The best time to apply a sanding sealer is after you’ve sanded your wood to its bare beauty before adding that final topcoat, like paint. But remember, avoid using it on stained surfaces unless you want to erase your masterpiece’s magical colors!
Now you’re all set to use a sanding sealer and create woodworking wonders like never before. So, grab your brush and let the woodworking magic begin! Follow these simple steps to get the best results:
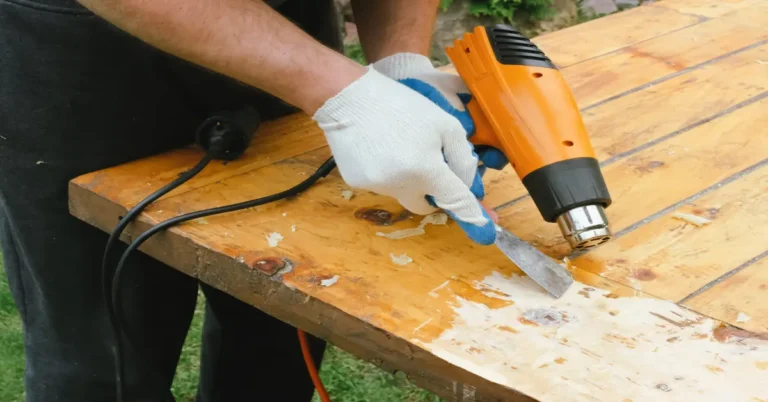
Step 1: Prepare the Surface
Ensure that the surface you plan to seal is clean, dry, and free from any dust or debris. If needed, sand the surface gently using fine-grit sandpaper to create a smooth texture.
Step 2: Shake or Stir the Sanding Sealer
Before use, give the sanding sealer container a good shake if it’s in liquid form or stir it well if it’s in a can. This ensures that any settled particles are evenly mixed.
Step 3: Application
Using a clean cloth or a brush, apply a thin and even coat of the sanding sealer onto the surface. Work in the direction of the wood grain to achieve a more uniform finish. Avoid applying the sealer too thickly, as it can lead to uneven drying and potential issues with the final coat.
Step 4: Let It Dry
Allow the first coat of sanding sealer to dry completely. Follow the manufacturer’s guidelines regarding the drying time, which is typically around 1-2 hours, depending on the product.
Step 5: Sand the Surface (Optional)
For an even smoother finish, you can lightly sand the surface after the first coat has dried. Use a fine-grit sandpaper and sand gently to avoid removing too much of the sealer.
Step 6: Apply Additional Coats (Optional)
Depending on the desired level of finish, you can apply additional coats of sanding sealer. Just remember to let each coat dry completely before applying the next one. Two or three coats are usually sufficient, but it depends on the specific product and your preferences.
Step 7: Final Sanding (Optional)
Once the last coat has dried, you can perform a final sanding if desired, using an extra-fine grit sandpaper. This step helps achieve an ultra-smooth surface before proceeding with any further finishing, such as varnish or paint.
Step 8: Clean Up
Clean your brushes and tools immediately after use with the appropriate cleaning solution, as specified by the sanding sealer’s instructions.
If you’re searching for a woodwork companion, try Apollo Sanding Sealer from Island Chemical. It could be just what you need for your projects!
Apollo Sanding Sealer is a nitrocellulose-based coating designed for various substrates. It provides exceptional sealing properties and is a reliable base for subsequent coats of transparent lacquers.
The sealer comes in different packaging options and requires a recommended ratio of 1:1 with Mayon Lacquer Thinner. It can seal wood surfaces, including furniture, doors, cabinets, fixtures, fittings, and wrought iron furniture.
The application method is through spraying, which dries in approximately 10 minutes to touch and 30 minutes for sanding or recoating. On top of that, it can provide sanding sealer coverage of up to 8 – 12 sq. m. per liter.
Are you interested to know more about sealants and paints? Log on to the Island Chemicals website for more featured products.
References:
https://www.thespruce.com/what-is-sanding-sealer-5195078
https://tiic-chem.com.ph/products/sealers/apollo-sanding-sealer/